Access rights and scopes
À l'issue de ce chapitre
- understand how Odoo decides whether or not a user sees a document;
- assign the access levels per area and know what each of them restricts;
- reuse an existing profile by duplicating a user;
- tell internal, portal and public users apart;
- partition data between several companies;
- inspect the rights actually applied to a person.
Creating a user is described in chapitre 5. This chapter deals with what comes next: setting finely who has access to what, and being able to diagnose an unexpected situation.
The principle
Understanding how Odoo decides whether or not a user sees a document saves you from proceeding by trial and error. The model rests on two distinct mechanisms, which should not be confused.
Two questions, two mechanisms
When a user opens a screen, Odoo answers two questions in succession.
| Question | The mechanism that answers it |
|---|---|
| Do they have the right to touch this type of document, and to do what with it? | The access rights, which authorise reading, writing, creating or deleting on a type of document. |
| Among those documents, which ones exactly? | The record rules, which filter on a condition: the salesperson, the company, the team. |
If the first answer is negative, the user gets an explicit access refusal. If it is positive but the rules exclude every record, they see an empty screen: with no error message. This difference in symptom already tells you which layer to examine.
Groups
A group is a named set of rights. The user does not receive those rights one by one: they receive groups, and the rights follow.
A group can imply another: its members then automatically belong to the implied group, and hold the rights of both. This is what builds the levels within one area: the higher level implies the lower one and adds its own rights to it.
Note
A user therefore often belongs to far more groups than were explicitly assigned to them. The Groups button on their record displays the actual list, implications included (see section 6.6).
Access rights never open less
An access right associates a group, a type of document and four authorisations: read, write, create, delete.
The user obtains an authorisation as soon as at least one of their groups grants it. No access right takes anything away: they add up.
Point d'attention
There is no such thing as a "negative access right". For a person to stop seeing a type of document, you have to remove the group that opens it to them, not add something that would forbid it.
Record rules
A rule carries a type of document, a condition (called a domain) and possibly some groups. Depending on whether or not it targets groups, its effect is radically different.
| Kind | Effect |
|---|---|
| Group rule (groups are filled in) | Applies only to the members of those groups. The group rules that concern one and the same user combine with or: it is enough for a single one to accept the document for that user to see it. Adding a group rule therefore widens the scope. |
| Global rule (no group filled in) | Applies to everyone, without exception. Global rules combine with and with everything else. It is the only mechanism that genuinely restricts. |
A user's final scope is therefore: all the global rules, and at least one of the group rules that concern them.
Point d'attention
A rule only restricts the members of the groups it targets. If, for a type of document, none of the user's groups is targeted by a group rule, then no group rule limits them any more: they see everything their access rights allow. This is the most frequent cause of a scope that is wider than intended.
A complete example
The two sales levels illustrate the whole model.
| Level assigned | What Odoo puts in place |
|---|---|
| User: Own Documents Only | The corresponding group is targeted by a rule whose condition is "the salesperson is me, or the salesperson is not filled in". |
| User: All Documents | This level implies the previous one (so the user is in both groups) and adds a rule whose condition is always true. |
The user at the higher level comes under two group rules. They combine with or: "my documents" or "everything". The second wins, and the user sees the lot.
What this example shows
Odoo did not remove the restriction in order to widen the scope: it added a rule that neutralises it. That is the pattern of the whole architecture: you widen by adding, never by taking away.
Making changes without breaking anything
These mechanisms dictate a few rules of conduct.
- Do not change a rule shipped by Odoo. It applies to every member of its group, including uses you know nothing about; your change shows up nowhere for whoever comes to diagnose the system later; and depending on the module it is rewritten on update. Create an additional rule instead, targeting a dedicated group.
- To widen, add a group rule, rather than extending the domain of an existing rule. The effect is the same for the people targeted, with no consequence for the others.
- To restrict, only a global rule will do: and it applies to everyone, administrator included. Check it on a real case before leaving it in place.
- To withdraw an access, remove the group that grants it. Looking for something that might forbid it is a dead end: that mechanism does not exist.
- Create a dedicated group rather than adapting a standard one: and really create it, do not duplicate it (see section 6.1.7). A group that belongs to no module is an addition; a modified standard group is a debt.
- Have a module carry the lasting additions. A rule entered directly in the database exists on that database only: it will not be found on the test environment, nor after a restore, nor on a database created later.
Note
The first three rules are enough to cover the bulk of configuration needs. The others concern changes meant to last, which are better entrusted to your integrator.
What duplicating a group does (and does not) copy
Duplicating a group to make a variant of it looks economical. The result is not what you expect: depending on the element, the copy receives independent instances or mere links to the originals.
| Element of the group | What the copy gets |
|---|---|
| Access rights | Duplicated. The copy has its own authorisations, which can be changed with no effect on the original group. |
| Record rules | Shared. No rule is recreated: the same rules now target both groups. |
| Menus and views accessible | Shared, on the same principle. |
| Implied groups | Shared. The copy carries the same groups as the original. |
| Members | Carried over. The users of the original group are found in the copy. |
Point d'attention
Duplicating a group therefore does not make its rules independent. Changing the domain of a rule afterwards to adapt it to the variant changes it for the original group as well , that is to say, exactly the accident the first rule of conduct sets out to avoid, reached by the route everyone thought was safe.
A second effect: the copy inherits the members of the original. The new group is granted silently to people who were never the target.
Astuce
For a variant, create an empty group, attach a rule of its own to it, then add the people concerned. That is three extra operations and no surprises.
Assigning the access levels
The areas and their levels
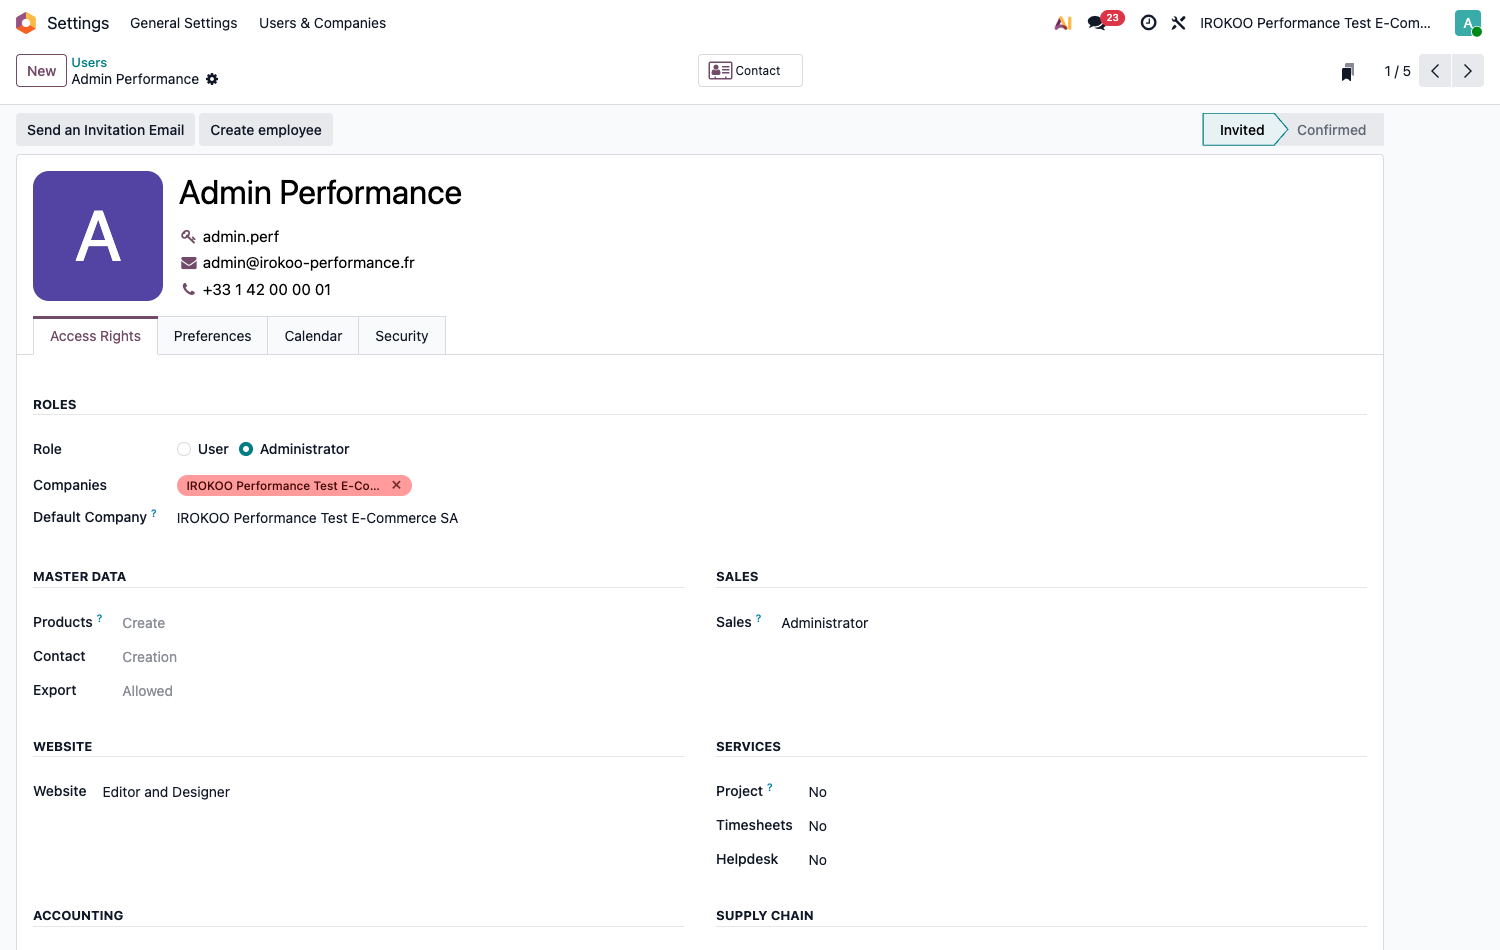
The Access Rights tab of the user record presents the functional areas grouped by category. Each area is set through a drop-down list offering its levels, from the most restricted to the widest. An area left at No (or at whatever label stands in for it) means the user has no access at all to that scope.
Above these areas, the Roles group carries the user's general role and, in a multi-company setup, the companies they have access to.
For sales, for example:
| Level | Scope granted |
|---|---|
| No | No access to sales documents. This is the default value of any area not assigned. |
| User: Own Documents Only | Sees only the quotations and orders on which they are the salesperson. |
| User: All Documents | Sees all the sales documents, whoever the salesperson is. |
| Administrator | Full access, including the configuration of the application. |
- Open Settings › Users & Companies › Users and select the user.
- Open the Access Rights tab.
- For each area that matters, choose the level in its drop-down list; leave the others at No.
- Save.
What "own documents only" actually restricts
This level is the one that surprises people most. It does not hide an application: it restricts the records that are visible to those the user is responsible for.
Point d'attention
The restriction bears on the document, not on the data it contains. A salesperson limited to their own orders still reaches the complete customer records, the products and the prices, they need them to draw up a quotation. If the confidentiality concerns the customer file itself, this level is not enough.
The field that determines "their" documents varies from one application to another: the salesperson on an order, the assignee on a task, the employee on an expense. In case of doubt, the check is made on a real case rather than by deduction (see section 6.6).
Going outside the standard levels
Some groups belong to no area: they therefore appear in no drop-down list. They are the ones that open the cross-cutting or secondary capabilities: managing several units of measure, reaching the pricelists, working in multiple currencies.
Point d'attention
In ordinary use, the user record only drives the levels per area: groups outside any area do not appear on it. They become visible and editable only in developer mode.
To grant or withdraw a right outside any area:
- Enable developer mode (see chapitre 3).
- Open the user's record, Access Rights tab.
- Scroll down to the Extra Rights section, which only appears in developer mode: each right outside an area is a checkbox there.
- Tick or untick, then save and check the result obtained (see section 6.6).
The operation can also be carried out from the group, which is better suited to handling several people at once: open Settings › Users & Companies › Groups, then the Users tab of the group you want.
To withdraw a right outside any area, the simplest way is to start from the person rather than hunt for the group:
- Open Settings › Users & Companies › Users and select the user.
- Click the Groups smart button: the list of their groups appears, with the area each of them belongs to.
- Open the group to be withdrawn.
- In the Users tab, remove the person.
- Save.
Astuce
The group's Inherited tab shows the groups it carries and the groups that carry it. It is the best place to gauge the real reach of a right before granting it: an unassuming group can imply several others.
Astuce
Developer mode also adds an information button next to each area. It details what the selected level actually covers, more reliable than deducing it from its wording.
Reusing an existing profile
Rebuilding a user's rights by hand for a colleague in the same job is slow and unreliable. Duplication reproduces the profile exactly.
- Open Settings › Users & Companies › Users.
- Select the user who serves as the reference.
- Click Actions then Duplicate.
- Odoo creates a copy carrying
(copy)in the name and in the login, with the same groups and the same access levels. - Replace the name and the email address with those of the new arrival.
- Check the companies accessible and the default company.
- Save, then send the invitation.
Note
The password is not copied: the new user sets their own from the invitation link. Duplication therefore passes on no secret.
Note
Duplicating a user behaves as you would expect: the copy receives the same groups, and nothing else is affected. It is duplicating a group that holds surprises (see section 6.1.7).
Astuce
Create one reference user per typical job (inside sales, buyer, accountant) without giving it a personal login, and archive it. It becomes a profile template to be duplicated at every arrival, rather than a profile reconstituted from memory.
Point d'attention
Duplication faithfully reproduces the profile, including its flaws. If the reference user has accumulated rights over time, the copy inherits them. Check the source profile before making a template of it.
Internal, portal and public users
Three kinds of user coexist, and the distinction has direct consequences.
| Kind | Access and use |
|---|---|
| Internal | An employee of the company. Reaches the management interface according to their rights. Consumes a licence. |
| Portal | An outside party: customer, vendor, subcontractor. Reaches only their own documents, in a simplified interface. Does not consume a licence. |
| Public | An unidentified visitor to the website. Reaches only the published content. |
An external user carries an explicit banner at the top of their record, which avoids confusing them with a colleague.
Point d'attention
Turning a portal user into an internal user consumes a licence and opens up access to all the documents allowed by their groups, not only their own. This switch is decided, it is not done as a stopgap.
The procedure for opening portal access is described in chapitre 5.
Partitioning several companies
When the database hosts several entities, each user has a list of accessible companies and a default company.
- Open the user's record, Access Rights tab.
- Fill in the Companies they have access to.
- Fill in the Default Company, active at the opening of a session.
What the user actually sees
The company selector in the top bar allows several companies to be active at once. The user then sees the documents of all the companies ticked, not only of the default company.
Some data stays shared whatever the active company: products and contacts in particular, when they are not attached to any company. Accounting and commercial documents, for their part, are always partitioned.
Point d'attention
A user with access to only one company will never see the documents of the others, including those a colleague sends them by direct link: the document then appears as non-existent. That is the expected behaviour, not a fault.
Inspecting the rights applied
Rather than working out the effect of the groups in your head, Odoo displays the result.
- Enable developer mode (see chapitre 3).
- Open the record of the user concerned.
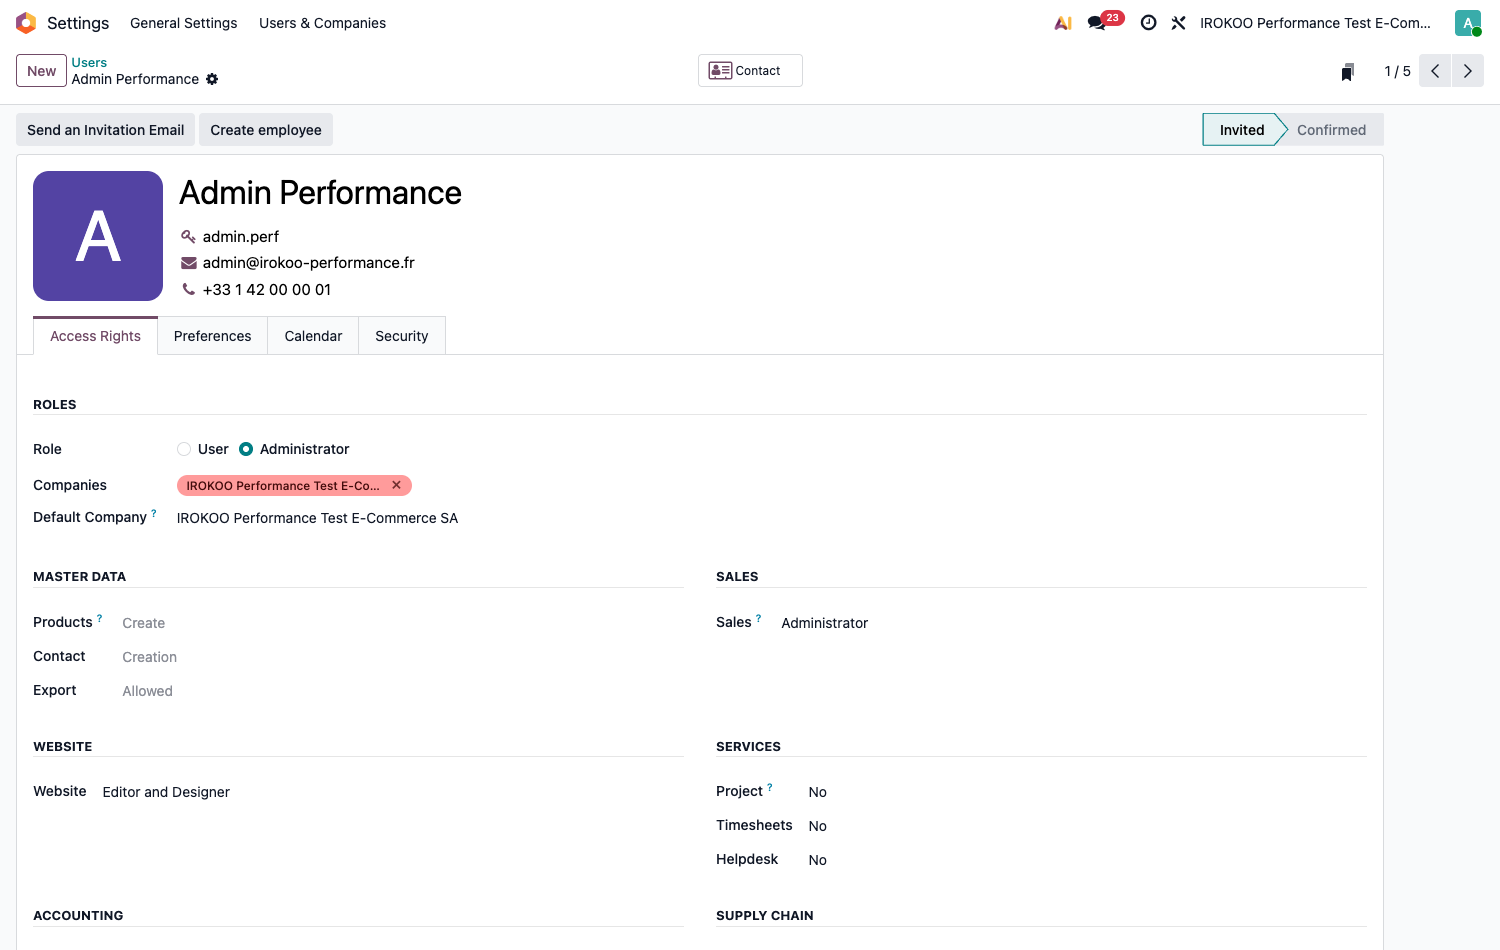
- Three smart buttons appear at the top of the form, each carrying its count: - Groups: the complete list of the groups applied, implications included. It has two columns: Privilege, which indicates the area the group belongs to, and Name. An empty Privilege column flags a group outside any area, one of those the drop-down lists do not offer; - Access Rights: the read, write, create and delete authorisations, type of document by type of document. The count commonly runs into the hundreds: that is normal, every application contributes some; - Record Rules: the scope restrictions that apply.
These three screens are inventories: they show the state obtained. They allow neither creation nor deletion, but the values displayed remain editable there: the list of access rights is even editable inline. Treat them as read-only screens: a change made here bears on the general configuration, not on the single user being inspected.
Astuce
This is the first thing to look at when a user reports that they cannot see a document. The answer reads straight off it, whereas a discussion about which groups are expected quickly turns into guesswork.
Going further
For a need the standard levels do not cover, the technical screens give access to the three layers themselves. They require developer mode to be active.
| Screen | Content |
|---|---|
| Settings › Users & Companies › Groups | The existing groups, their members, and the groups they imply. |
| Settings › Users & Companies › Privileges | The functional areas and the order of their levels. |
| Settings › Technical › Security › Access Rights | The authorisations per type of document and per group. |
| Settings › Technical › Security › Record Rules | The scope restrictions and their domain. |
A record rule reads in three points: the type of document concerned, the groups it applies to: a rule with no group is said to be global and applies to everyone , and the domain, which expresses the condition retained.
Point d'attention
Changing a standard rule or an access right shipped by Odoo produces effects at a distance, often noticed weeks later on a function with no apparent connection. For a lasting need, a dedicated module that adds its own groups and rules holds up over time; a direct change to the standard rules is lost at the first update.
Note
These screens can be consulted with no risk: they explain the behaviour observed. It is the changes that call for precautions.
Tracing changes
On sensitive documents, Odoo records in the chatter (the area for exchanges and history at the bottom of every document, described in section 4.1) who changed what, when, and what the previous value was. The tracking covers the fields declared as tracked, and that scope varies from one application to another (see section 4.1).
For accounting operations, locking the periods completes this tracking by preventing any change prior to a given date (see chapitre 14).
Good practice
Rights that hold up over time
- Start from the job, not from the person: reason by function rather than case by case, and give each typical job a reusable template (see section 6.9.1).
- Grant the minimum: extending a right takes ten seconds; working out after the fact who was able to change what takes a day.
- Review at every move: a change of job should be accompanied by a review of the rights, failing which they pile up.
- Archive rather than delete: an archived user can no longer log in, but stays attached to the history of the documents they created.
- Document the departures from the norm: write down why a person departs from the template for their job, otherwise the reason is lost and nobody dares touch it.
Giving substance to a typical job
Odoo has no "profile" object: nothing lets you declare a job and assign it in one gesture. Two techniques nevertheless produce that effect, with different properties.
| Technique | Properties |
|---|---|
| A reference user, duplicated at every arrival | No technical notion to create, no developer mode. On the other hand the template is only one record among others: nothing marks it out as the reference, and a change to the template is not passed on to the people already created. |
| A job group, which implies others | A named object, assigned in one go, and modifiable for everybody at once: adding a right to the group grants it to all its members. Requires developer mode, and is better carried by a module. |
For the first, the procedure is the one in section 6.3.
For the second:
- Enable developer mode (see chapitre 3).
- Open Settings › Users & Companies › Groups and create a group bearing the name of the job.
- In the Inherited tab, fill in the Implied Groups: the levels and the rights the job is to grant.
- Assign that single group to the people concerned, from its Users tab.
Note
Rights obtained by implication appear on the user record as implied and not as explicitly assigned: the drop-down lists of the areas concerned fill themselves in. That is the expected behaviour, and it has the merit of making clear what comes from the job and what has been added for the person.
Astuce
The job group quickly becomes the better of the two: a change of organisation is passed on by modifying a single object, instead of going back over every user record created from a template that has become obsolete.