Manufacturing
À l'issue de ce chapitre
- declare your work centres and compose your products in bills of materials;
- launch a manufacturing order and run it operation by operation;
- track the cost price and post the work in progress;
- entrust a manufacturing order to a subcontractor and control quality.
The Manufacturing application drives production: composition of the products, scheduling of the operations, launching and tracking of the orders, valuation of the costs, and use of subcontracting.
Configuring manufacturing
Manufacturing › Configuration › Settings brings the options together in two blocks.
Operations
| Option | What it brings |
|---|---|
| Work Orders | Breaks the manufacturing order down into operations carried out at work centres, with time tracking. |
| Subcontracting | Allows all or part of a manufacturing order to be entrusted to a third party. |
| Shop Floor | Opens an interface dedicated to the operators, in tiles, designed for a tablet at the foot of the line rather than for a desk. |
| Barcode Scanner | Allows orders to be processed with a scanner, without going through the management screens. |
| Quality | Inserts checks into the flows. Belongs to a separate application. |
| Unlock Manufacturing Orders | Allows the quantities to consume to be modified without prior approval. |
| By-Products | Allows a manufacturing order to produce several items: the main one and its residues. |
| Allocation Report for Manufacturing Orders | Shows which sales orders the quantities produced can be allocated to. |
Planning
The Master Production Schedule plans manufacturing and purchasing from sales forecasts, rather than in reaction to the orders received. It suits productions with long cycles or marked seasonality.
- Tick Master Production Schedule.
- Set the Default Time Range (Yearly, Monthly, Weekly or Daily) and, for each of them, the Number of Periods shown as columns.
- Save: an add-on module is installed and creates the screen.
It then becomes reachable by two paths, which open the same screen: Manufacturing › Planning › MPS › Master Production Schedule and Inventory › Operations › Procurement › Master Production Schedule.
Astuce
The range chosen governs the planning grain: twelve monthly columns cover a year of forecasts, thirty daily columns a month of workshop activity. Choose it according to the horizon of your sales forecasts, not according to the level of detail you would like: a monthly schedule can be detailed afterwards, whereas a daily schedule over twelve months becomes unreadable.
Note
These two menus are reserved for users holding the manufacturing management right: an operator does not see them. The module moreover belongs to the Enterprise edition, and brings with it the installation of the purchasing part of Inventory if it is not already there: the schedule planning what is bought as well as what is manufactured.
Note
Without Work Orders, a manufacturing order consumes the components and produces the result in a single operation. That is enough for a simple assembly, insufficient as soon as times have to be tracked per work centre or steps sequenced.
Point d'attention
Unlock Manufacturing Orders removes a safeguard: operators can then change the quantities consumed without anyone approving the difference. On a production whose components are valued, this feeds straight through to the value of the stock.
Only activate it if consumption differences are frequent and legitimate: material cut to measure, variable offcuts , and if the control is carried out some other way.
Astuce
The Shop Floor and the Barcode Scanner are meant for operators, not for managers. Only activate them if someone is really working at the station: in a workshop of two people entering data from a desk, they add screens without simplifying anything.
Declaring the work centres
Note
Work centres assume the Work Orders option is active. Without it, the menu does not exist and a manufacturing order runs as a single operation, with no work centre and no duration.
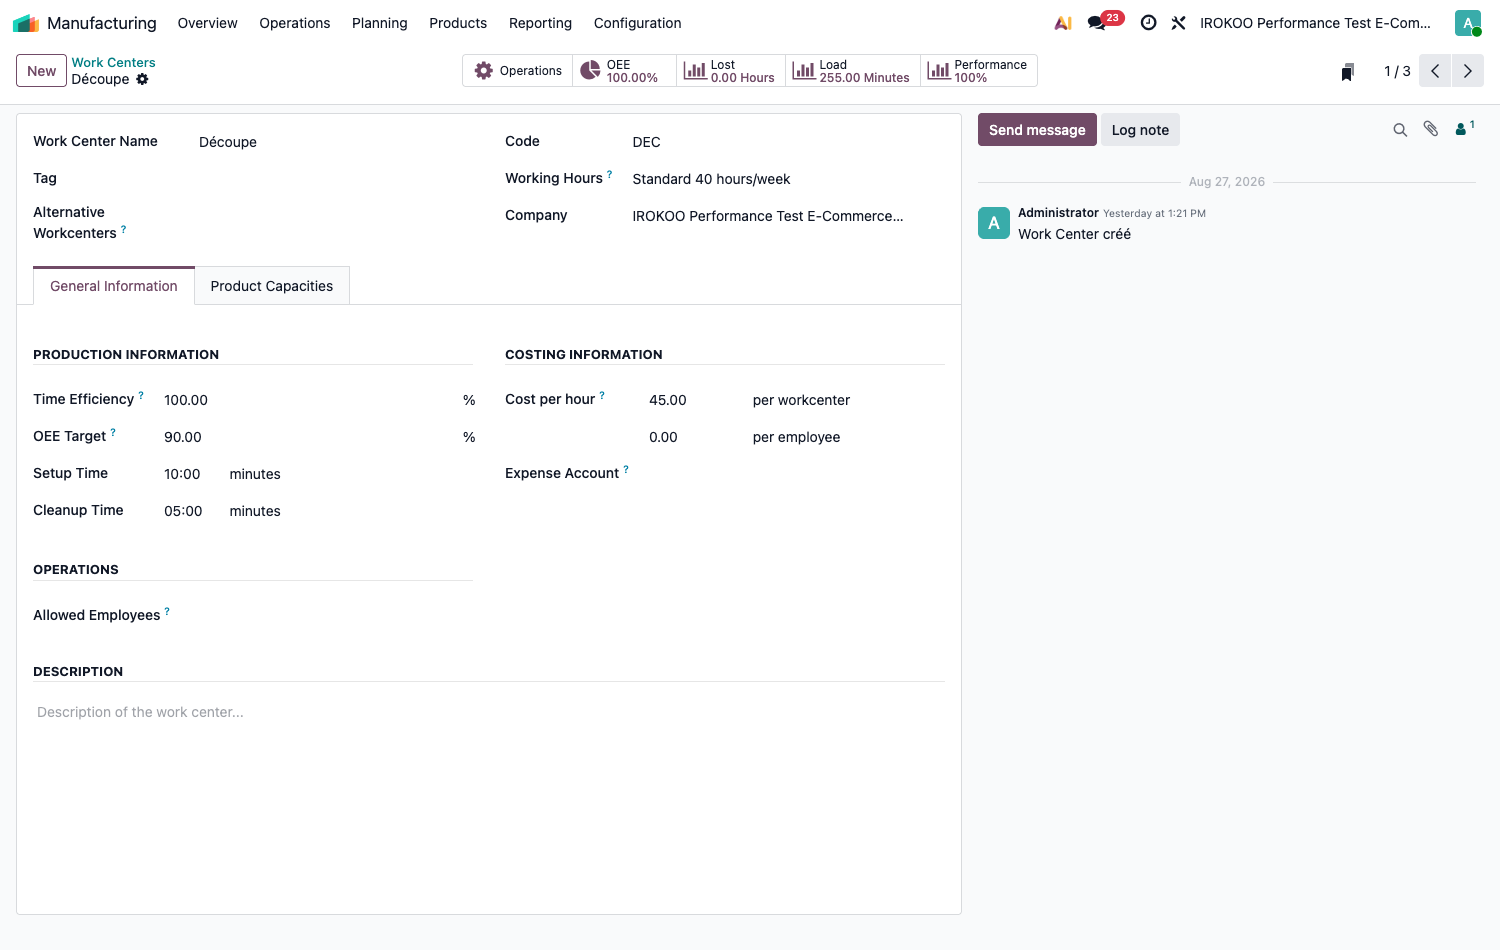
- Open Manufacturing › Configuration › Work Centers.
- Click on New.
- Fill in the Work Center Name and its Code.
- Choose the Working Hours, which define the operating range of the work centre.
- In the Production Information block: - the Time Efficiency weights the theoretical durations: 80% lengthens the times by a quarter, 120% shortens them; - the OEE Target sets the overall equipment effectiveness aimed for, serving as the reference for the indicators; - the Setup Time and the Cleanup Time are added to each operation, before and after production.
- In the Costing Information block, fill in the Cost per hour: a value per workcenter. In the Enterprise edition, a second amount with no label follows it, followed by the note per employee, for labour billed separately.
- Fill in, if need be, the Expense Account, which receives the costs of the work centre when production analytic accounting is in place.
- Save.
Note
Capacity is not set on this page but in the Product Capacities tab: a work centre may handle four pieces of one item at once and only one of another. With no entry in this tab, the work centre handles one unit at a time.
Astuce
The Cost per hour is split in two for a precise reason: the first amount covers the machine (depreciation, energy, maintenance), the second the operator running it. Separating them lets you compare an automated work centre with a manual one on the same basis.
Point d'attention
The hourly cost of the work centre and the operation durations determine the cost price of the products manufactured. Approximate values produce approximate margins across the whole of production.
Composing the products
Creating a bill of materials
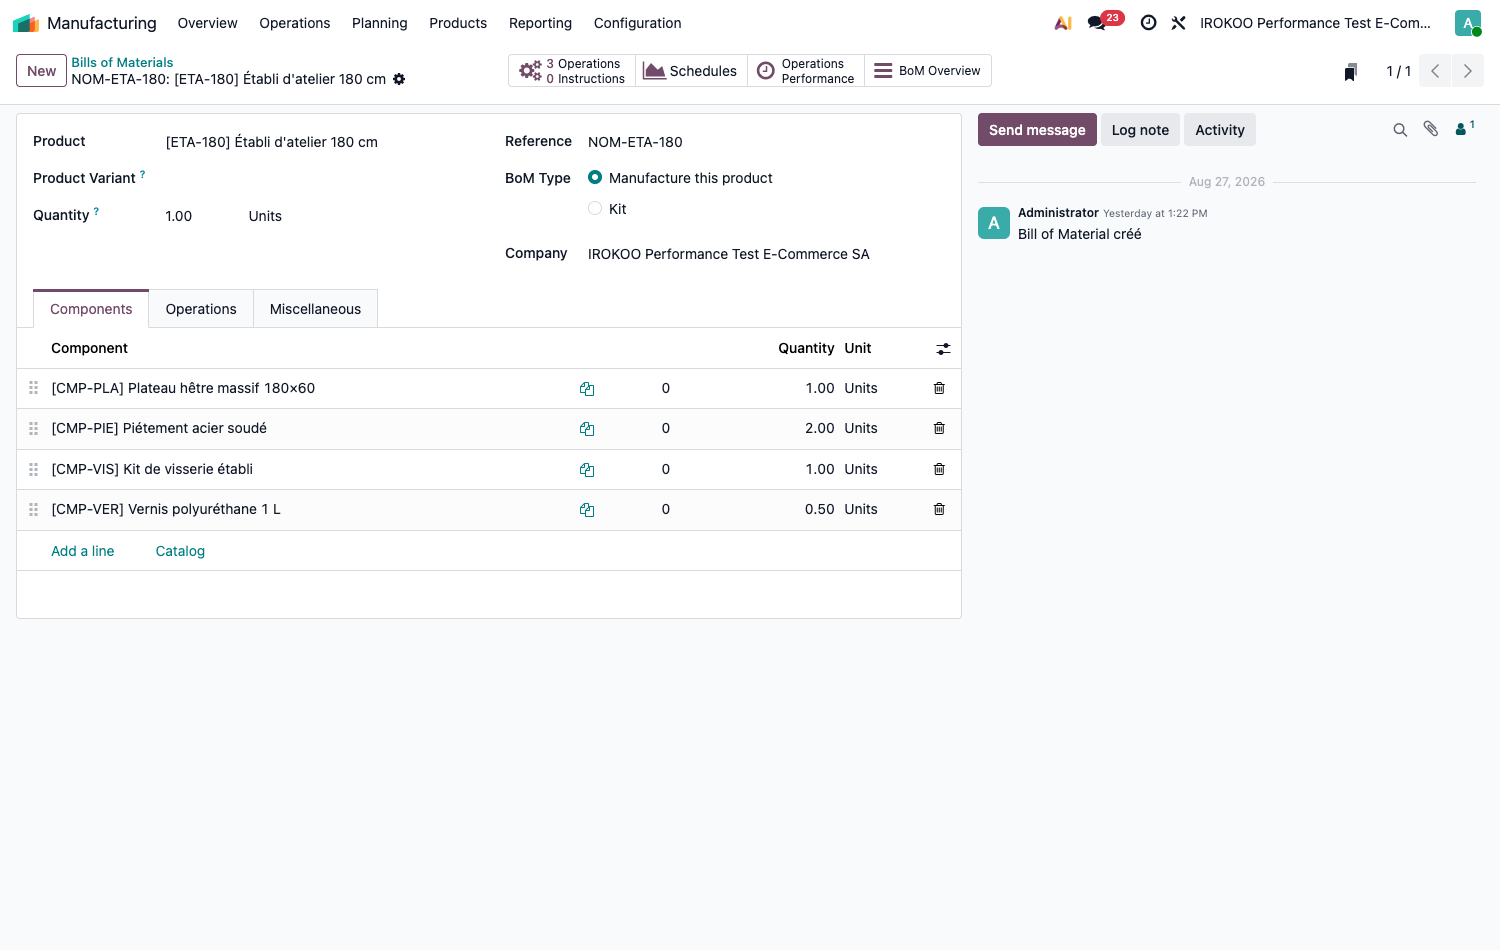
- Open Manufacturing › Products › Bills of Materials.
- Click on New.
- Select the finished product and the reference quantity.
- Choose the BoM Type: - Manufacture this product: classic in-house production; - Kit: the product is sold as a set but delivered as components, with no manufacturing order; - Subcontracting: the transformation is entrusted to a third party. This type is only offered once the Subcontracting option has been activated in the settings.
- In the Components tab, add each item with its quantity for the reference quantity.
- Save.
Adding the operations
Note
The Operations tab only appears on the bill of materials with the Work Orders option, and only for the Manufacture this product and Kit types.
- Open the bill of materials.
- Select the Operations tab.
- Add the operations in the order of execution, filling in for each one: - its title; - the Work Center where it is carried out; - the expected duration; - the work instructions, which the operator can consult.
- Save.
Note
Components can be attached to the operation that consumes them. The operator then sees only the items needed for their step, which limits picking errors.
Multi-level bills of materials
A component may itself have a bill of materials: it is a sub-assembly. Odoo handles these levels in cascade, creating the manufacturing orders needed at each level when the sub-assembly is not available in stock.
Launching a manufacturing order
Creating the order
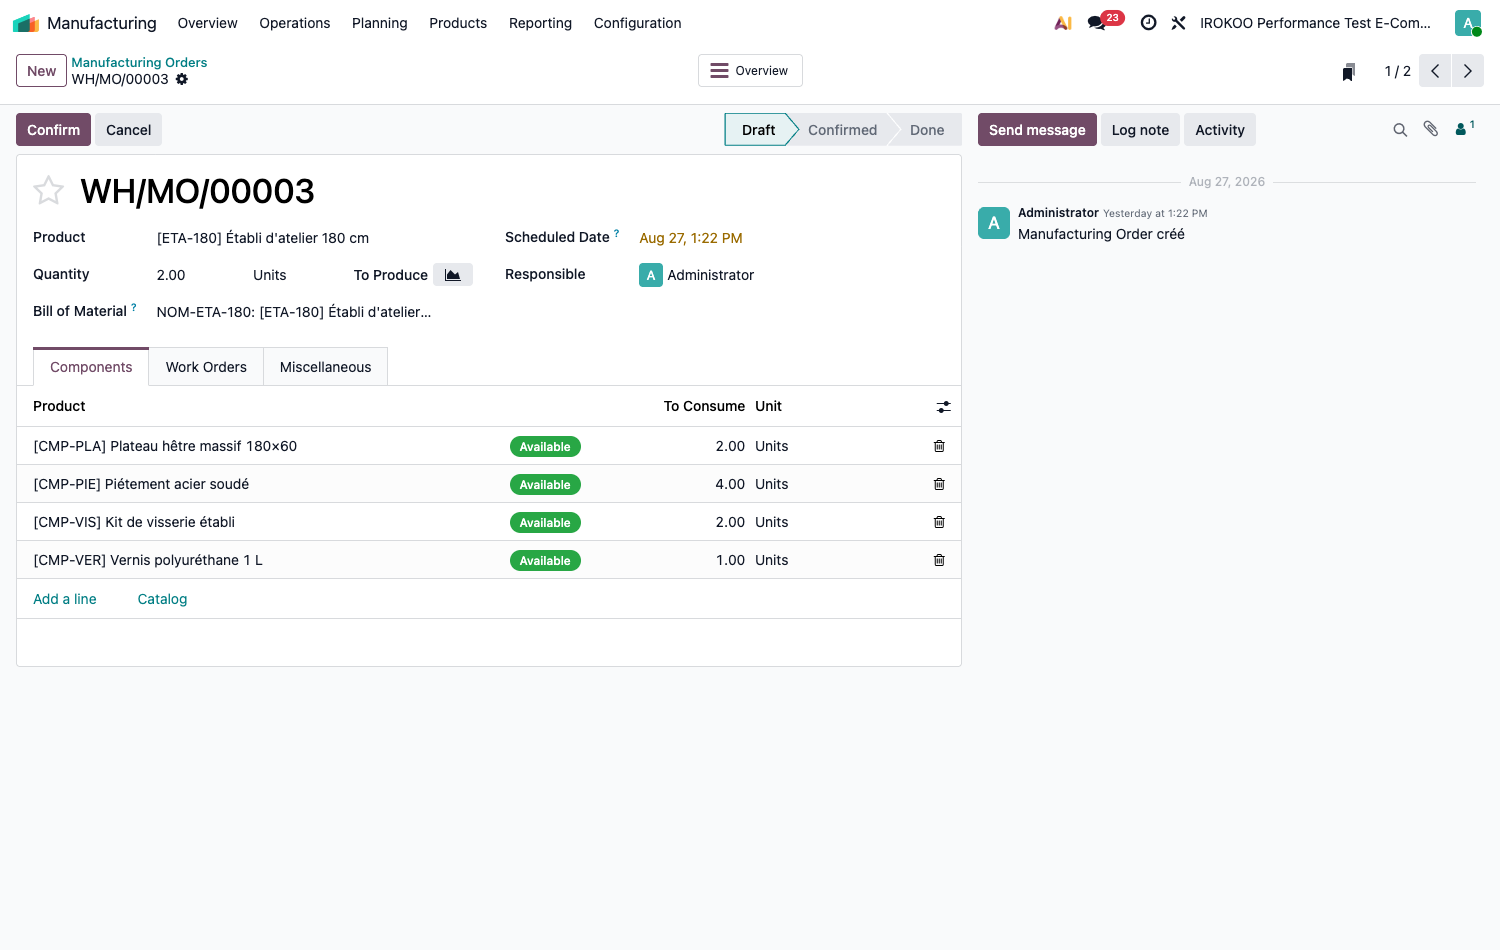
- Open Manufacturing › Operations › Manufacturing Orders.
- Click on New.
- Select the product to be manufactured: the bill of materials is proposed automatically.
- Enter the quantity and the planned date.
- Click on Confirm.
The components are reserved as far as the available stock allows. The forecast column shows for each one whether it is available or to be supplied.
Supplying the missing components
- From the manufacturing order, click on the Overview smart button.
- The screen presents the full tree of the need: components, sub-assemblies, planned dates and supply status of each line.
- Use the replenishment button next to the missing lines: Odoo creates the requests for quotation for the purchased items and the manufacturing orders for the manufactured ones.
Note
A favourable indicator on the sales order while components are flagged as to be ordered is not a contradiction: Odoo reckons that the time left still allows supply to arrive on time. It is a projection, which assumes vendor lead times are kept.
Running the operations
- Open the manufacturing order and select the Work Orders tab.
- On the first operation's row, click the green play button, whose tooltip reads Start: the time is counted down.
- At the end, click the tick button on the same row, tooltip Done.
- Chain the following operations in the order planned.
Unbuilding or scrapping
Two operations deal with what has not worked out, and they do not do the same thing.
| Operation | Effect |
|---|---|
| Unbuild Orders | Takes a finished product apart to recover its components. The finished product leaves stock, the components enter it, according to the bill of materials. To be used on an item assembled by mistake, or whose parts are to serve again. |
| Scrap | Definitively takes a quantity out of stock to a scrap location, with nothing in return. To be used on damaged components or a failed production, from which nothing can be recovered. |
Both are reachable from Manufacturing › Operations, and unbuilding also from the button of the same name on a completed manufacturing order.
Point d'attention
Scrapping makes the corresponding value disappear from the stock: it is a loss, recognised as such in accounting. Unbuilding, for its part, transfers the value of the finished product to its components. Choosing one for the other distorts the valuation in one direction or the other.
Closing the order
- Go back to the manufacturing order.
- Check the quantities consumed and the quantity produced.
- Click on Produce.
- Confirm.
The order moves to the done status: the components leave stock, the finished product enters it.
Astuce
For a partial production, enter the quantity actually obtained and validate: Odoo offers to create a backorder for the balance, which keeps the traceability of both orders.
Tracking costs
Cost price
- Open the record of the manufactured product.
- Use the computation of the cost price from the bill of materials.
The computation adds up the cost of the components and, for each operation, its expected duration multiplied by the hourly cost of its work centre.
Posting the work in progress
On long manufacturing runs, the value of the components already consumed and of the time already spent is reflected nowhere as long as the order is not closed. A work in progress entry lets that value be recognised during the financial year.
Recognising what is committed. On the manufacturing order in progress:
- the Components tab, Consumed column, gives the quantities already picked;
- the Work Orders tab, Real Duration column, gives the time already spent;
- the Overview button compares the cost from the bill of materials with the cost actually committed, work centre charges and labour included.
Posting the entry. The operation is triggered from the Actions menu, from the record of an order as well as from the list.
- Open Manufacturing › Operations › Manufacturing Orders.
- Tick the order or orders to be recognised, or open directly the one concerned.
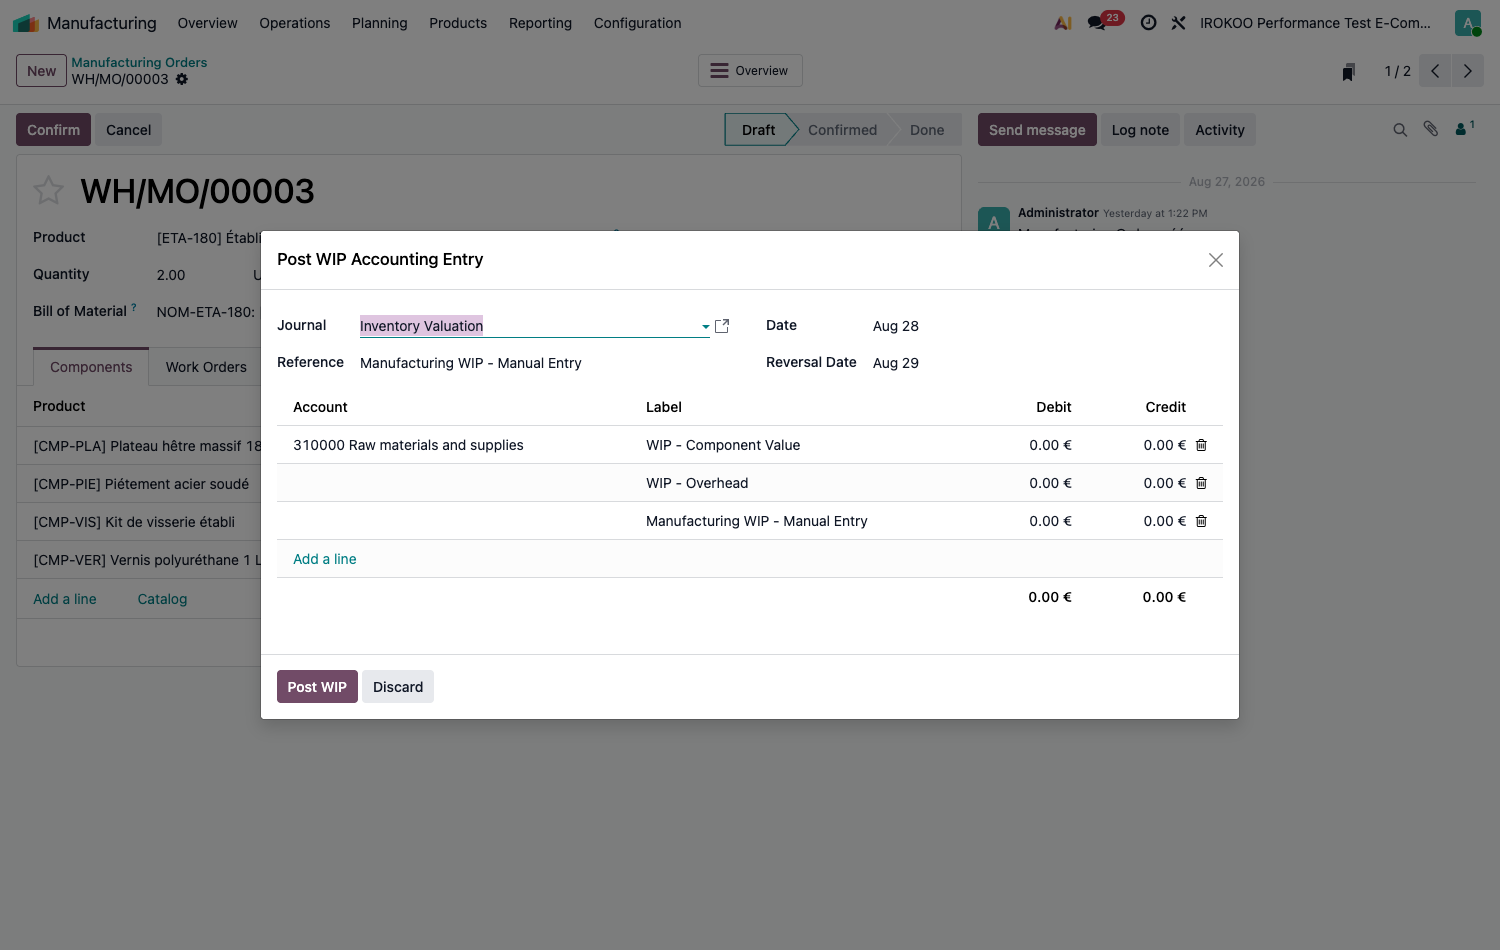
- Click on Actions then Post WIP Accounting Entry.
- In the window that opens, check the Journal, the Reference and the Date.
- Check the Reversal Date: the reversing entry is created and posted immediately, but carried at that date: generally the first day of the following period.
- Check the lines proposed: the two credits WIP - Component Value and WIP - Overhead, and the work in progress debit that balances them. Check their accounts and their amounts; a line can be added if need be.
- Click on Post WIP.
Point d'attention
This action is reserved for users holding the accounting rights. A production manager does not see it in the Actions menu, even on a database where everything is correctly configured.
The reversal is not to be done by hand: the Reversal Date schedules it from the moment of posting. That is what makes the entry reversible without intervention, and gives it its character of an inventory entry.
Point d'attention
The computation covers what is committed but not finished. On an order already in the Done state, the amounts proposed are nil: the work in progress has been cleared by the production, and there is nothing left to recognise.
The entry is therefore posted on Confirmed, In Progress or To Close orders, at the closing date.
Note
The WIP button only appears to an accounting user, and only once at least one work in progress entry has been posted on the order. It then opens the corresponding documents.
Note
The triggering itself stays manual: it is a closing decision, not an automatism. It is done at the period ends (monthly, quarterly or annual) for the orders whose duration exceeds the period.
Point d'attention
Posting work in progress changes the result of the period. It is put in place with the accountant, who validates the accounts used and the periodicity retained.
Planning
Work centre load
Open Manufacturing › Planning › Work Orders › Planning by Workcenter to view the forecast load per work centre, spot the bottlenecks and move the orders.
Note
This view assumes the Work Orders option is active: with no work centres, there is no load to spread. It moreover belongs to the Enterprise edition.
Master production schedule
When production relies on forecasts rather than on firm orders:
- Activate the master production schedule in Manufacturing › Configuration › Settings.
- Open Manufacturing › Planning › MPS › Master Production Schedule.
- Add the products to be planned.
- Enter the forecast demand per product and per period, correcting it by hand when history does not reflect what is expected: a seasonality, a new market.
- Odoo computes the net requirements, taking account of the stock, the orders in progress and the stock targets entered, then proposes the quantities to be replenished.
- Create the corresponding purchase orders and manufacturing orders.
Point d'attention
Set to Manual (the default value of the Replenishment Trigger field) the master schedule suggests quantities without creating anything. Set to Automatic, a daily scheduled action creates the corresponding orders without intervention; Never excludes the line from replenishment. Adding a product to the schedule triggers no purchase order and no manufacturing order: it is up to the user to create them from the proposals.
Point d'attention
Do not combine the master production schedule and the reordering rules on the same product. The two mechanisms each compute the same need on their own side: the forecast becomes false and unnecessary orders appear. A product belongs to one or the other.
Note
The master production schedule addresses products with long supply lead times or seasonal demand, for which the decision must be taken ahead of the customer order. For replenishment as you go, the reordering rules are enough and call for less upkeep.
Subcontracting a manufacturing order
Note
Subcontracting assumes the option of the same name is active in Manufacturing › Configuration › Settings. It installs an add-on module, which adds the bill of materials type, the subcontractors field and the locations of the stock left with the third party.
Preparing the subcontracted product
- Create the bill of materials of the product and choose the Subcontracting type.
- Fill in the Subcontractors in the field that appears.
- Add the components to be supplied to the subcontractor in the Components tab.
- On the record of the subcontracted product, Purchase tab, list the subcontractor as a vendor, with its processing price and its lead time.
Allowing the subcontractor to be resupplied
- Check, on the warehouse record in Inventory › Configuration › Warehouse Management › Warehouses, that the Resupply Subcontractors option is ticked in the Resupply block.
Note
This option only appears on the warehouse record once the subcontracting module is installed. On a database where the Subcontracting option in the settings is not ticked, the Resupply block only carries Buy to Resupply, Manufacture to Resupply and Manufacture: plus Resupply From if the multi-warehouse option is active. There is nothing more to look for.
Running the operation
- Order the subcontracted product from the subcontractor, like an ordinary purchase.
- Confirm the order: two transfers are created automatically: the sending of the components and the receipt of the finished product.
- Open the resupply transfer, check the component quantities, and validate the sending.
- On receipt of the transformed product, open the receipt and validate.
- Check and settle the subcontractor's bill, which covers the transformation service.
What subcontracting brings
- Traceability: the link is kept between the components sent and the product received.
- Costs: the processing price is built into the cost price of the finished product.
- Stock: the components held by the subcontractor stay valued in your stock, at a dedicated location.
Controlling quality
Point d'attention
Quality checks belong to a separate application, in the Enterprise edition. Ticking Quality in Manufacturing › Configuration › Settings installs it.
The procedures that follow assume that installation has been done; without it, neither the menus nor the buttons described exist.
Once the application is in place:
- Open Quality › Configuration › Quality Teams and create the teams responsible for the checks.
- Open Quality › Quality Control › Control Points and create a control point.
- Fill in: - the title of the check; - the product or the category concerned; - the operation type triggering the check: receipt, manufacture, delivery; - the type of test: pass/fail, measure with tolerances, or instruction to follow; - the team responsible.
- In the instructions tab, describe precisely the operating procedure and the acceptance criteria.
During the corresponding operation, a quality check button appears on the document. The operator runs the test and records the result before being able to carry on.
Note
Combine traceability by lot or serial number with the control points: the results are then attached to a precise lot, which allows a quality incident to be confined instead of a whole production being suspected.
Analysing production
The reporting menu of the application gives access to the production reports: quantities produced, adherence to lead times, differences between expected and actual durations, scrap rate, production costs.
A production dashboard is also available in the Dashboards application.
Astuce
The gap between expected duration and actual duration is the most useful indicator in the workshop: it reveals both badly filled-in bills of materials and work centres in difficulty. Analyse it by work centre and by product before adjusting the times.