Importing and exporting data
À l'issue de ce chapitre
- extract any set of records to a spreadsheet;
- understand the external identifier and what it makes possible;
- load data without creating duplicates;
- link records to one another at import time;
- diagnose a failed import.
A single mechanism for the whole database
Import and export are not features specific to an application. They are core operations, available from any list view: products, contacts, invoices, tasks, journal entries, stock locations. The procedure is the same everywhere, only the fields change.
That generality makes it the reference tool for three needs:
- data migration at go-live, from the previous system or from spreadsheets;
- mass modification of existing records: a price increase, a change of owner on three hundred files;
- extraction to a spreadsheet, for an analysis or for passing on to a third party.
Astuce
These three uses rely on the same round trip: you export what exists, you modify it in a spreadsheet, you re-import it. That is the way of working to favour, it guarantees that the file has exactly the shape Odoo expects.
Exporting
- Open the list view and apply the filters that delimit the scope you want.
- Tick the records, or tick the header box to select everything.
- Click Actions then Export.
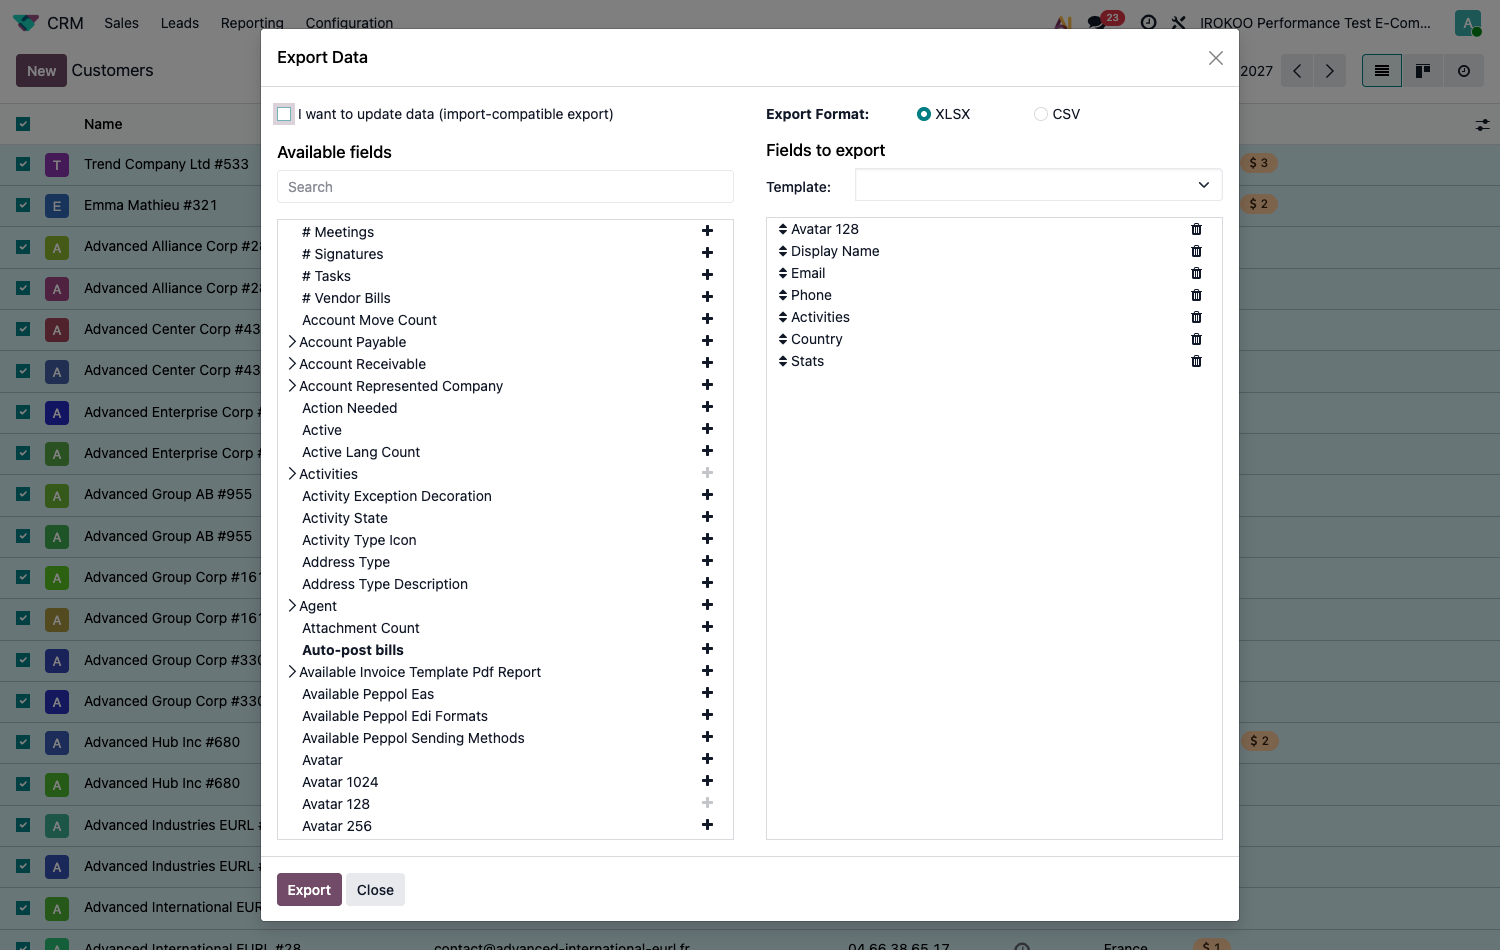
- Compose the list of Fields to export: look for the field you want in the Available fields column, then click the plus to its right. It joins the right-hand column.
- Remove a field from the selection with the bin icon beside it, and change the column order by dragging a field by its handle.
- Choose the Export Format: XLSX or CSV.
- Click Export.
Astuce
Fields marked with a chevron expand: they designate a linked record, and their content gives access to that record's fields. That is how you export a contact's country or an order's salesperson, without a second export.
The search box at the top of the column saves browsing a list that often runs to several hundred entries.
Choosing the format
| Format | Use |
|---|---|
| XLSX | Spreadsheet. Reading, formatting, passing on to a third party. The columns are typed and the numbers directly usable. |
| CSV | Text file. Re-import, automated processing, large volumes. Raw format, with no formatting, but accepted everywhere. |
Preparing a re-importable export
The box I want to update data (import-compatible export) changes the nature of the file produced. It adds an external identifier column and only exports the fields Odoo will know how to read back.
It is that box which distinguishes an export for consultation from an export for work. Without it, the file can be read but cannot be re-imported without creating duplicates.
Astuce
When a list of fields is to serve again (a monthly statement, a file intended for a partner), save it as a template. The Template field, at the top of the right-hand column, offers New template: name the selection, and it will be offered on subsequent exports.
The external identifier
This is the notion to understand before any import. It explains both why an import creates duplicates and how to prevent it.
Every record in Odoo carries an internal number, invisible and specific to the database. It cannot
serve as a reference point: product number 412 in one database is not the same in another. The
external identifier is a second name, textual and stable, which you choose yourself: for example
product_screw_m6_stainless.
It serves as the matching key at import:
- if the value in the External ID column is unknown to the database, Odoo creates the record and assigns it that identifier;
- if it is already known, Odoo updates the existing record instead of creating another one.
Why this is decisive
Without an external identifier, re-importing the same file twice creates two sets of records. With it, the second import simply corrects the first. That is what makes a data migration repeatable: you can load, spot an error, correct the spreadsheet and reload, as many times as needed, without ever polluting the database.
Astuce
Adopt a readable and durable convention: the reference from the original catalogue, the customer code from the previous system, the account number. The external identifier is the bridge between the two systems, and it outlives the migration.
Importing
- Open the list view of the record type concerned.
- Open the actions menu through the cog icon in the top bar, it only appears if no record is ticked , then click Import records.
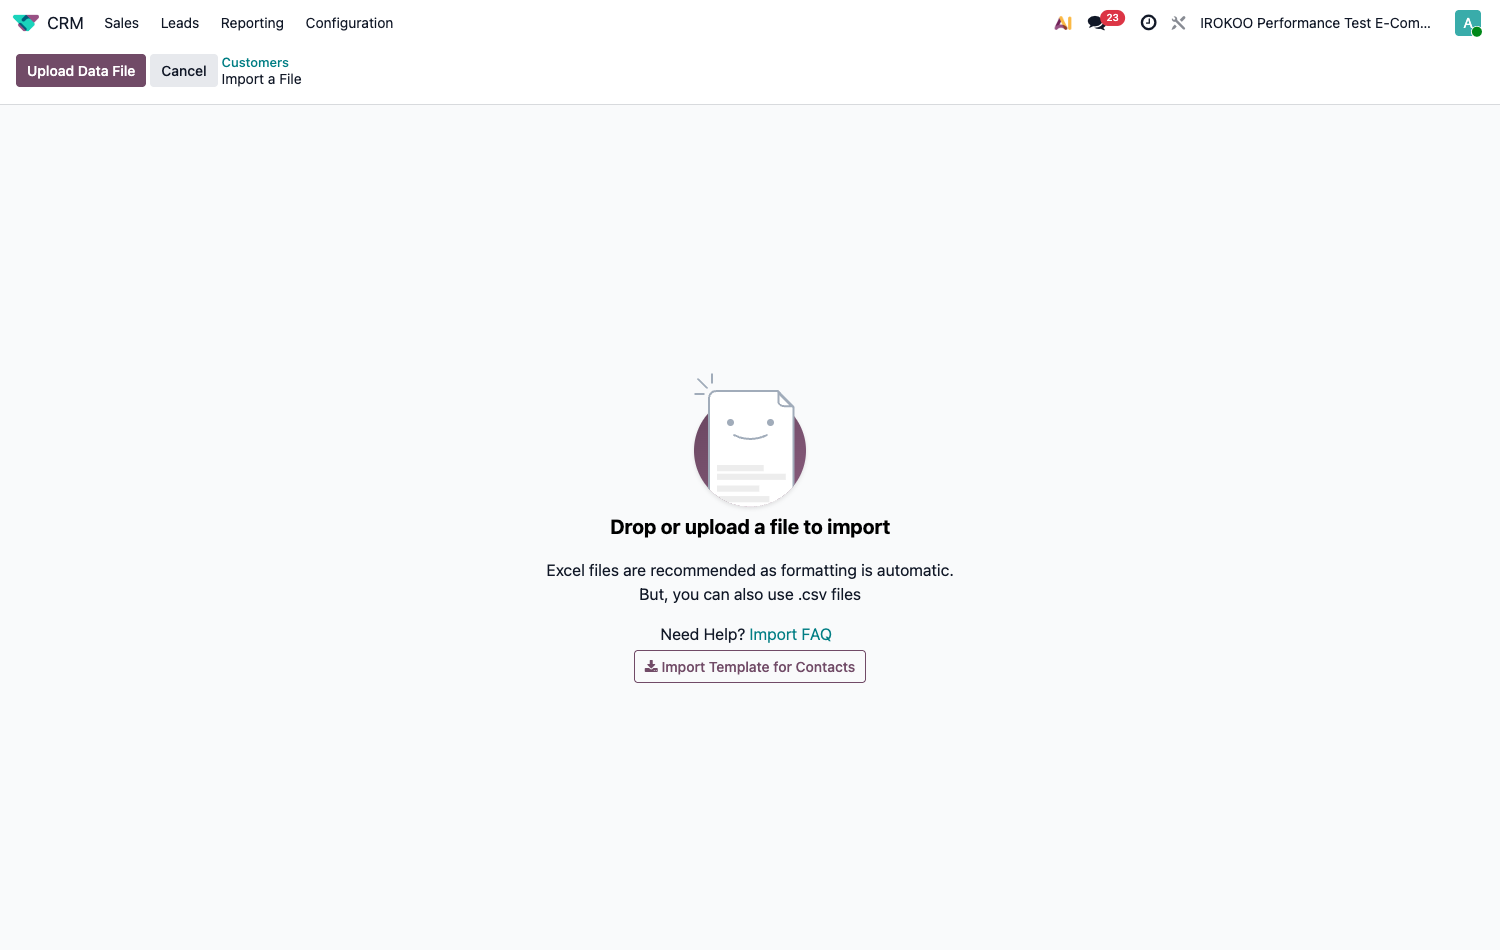
- Load the file with Upload Data File. Once the preview is shown, the button becomes Load Data File and serves to replace the file.
- If the workbook has several tabs, designate the right one in Sheet:.
- Check that Use first row as header is ticked when the file carries a heading row.
- Check line by line the match between the File Column and the Odoo Field. Odoo proposes a mapping for each column, which a cross allows you to remove and redo.
- Read the Comments column, which flags errors but also the expected entry conventions.
- Click Test: Odoo analyses the whole file without writing anything.
- Correct the errors, retest, then click Import.
Astuce
The Help pane, on the left, offers a ready-to-use import template for the main record types: contacts, products, orders, tasks, employees, journal entries. It carries the right columns, in the right order, with an example row. Less common types have none. It is the safest starting point: safer even than an export, since it contains only what is really importable.
Note
Test writes nothing: the database stays intact, whatever errors are encountered. There is therefore no reason to skip it.
The Formatting pane governs the interpretation of the file: column separator, decimal separator, date format, encoding. Odoo detects them on its own in most cases; they are corrected here when numbers or dates come out wrong in the preview.
Note
This pane only appears for CSV files. An XLSX workbook carries its own data types, and these settings would serve no purpose: that is in fact a reason to prefer the spreadsheet for a migration, decimal separator errors being the leading cause of wrong amounts at import.
Linking related records
A product refers to a category, a contact to a country, an invoice to a customer. These links are loaded by the value that designates the target record, in one of three possible ways.
| Column | Content | When to use it |
|---|---|---|
Category |
The displayed name | Readable, but fails if the name is missing or ambiguous. |
Category/External ID |
The external identifier | The safest. Insensitive to renaming and to homonyms. |
Category/Database ID |
The internal number | Reserved for transfers between two copies of the same database. |
Point d'attention
The three ways are mutually exclusive: filling in both the name and the external identifier for the same field makes the row fail, Odoo being unable to decide between the two indications.
For a field that accepts several values (a contact's tags, a line's taxes) separate them with
commas in the same cell: Prospect,Key Account,Export.
Astuce
These composite columns are painful to write from memory. First export two or three already correct records with the update box ticked: the headers obtained give the exact syntax, including for linked fields.
Updating in bulk
Modifying several hundred records always follows the same round trip:
- Filter the list on the records to modify.
- Export them with I want to update data (import-compatible export) ticked.
- Open the file in a spreadsheet and modify only the columns concerned, without touching the external identifier column.
- Re-import the file.
Odoo recognises each row by its external identifier and applies the modifications to the existing records.
Point d'attention
Do not delete rows from the file "so as not to modify them": it serves no purpose, an unchanged row is rewritten identically. Above all, do not delete the external identifier column, which would turn the update into the creation of duplicates.
Sequencing a data migration
A file that references a non-existent value fails, row by row. The loading order therefore follows from the dependencies: what is designated must exist before what designates it.
- Reference data: categories, units of measure, payment terms, taxes, tags.
- Third parties: contacts, companies, then their linked delivery addresses.
- The catalogue: products, then vendor prices and pricelists.
- Transaction data: opening stock, orders in progress, opening entries.
Astuce
On a file of several thousand rows, first isolate a couple of dozen representative rows in a separate file and import them. A format error spotted on twenty rows is corrected in a few minutes; the same error noticed after the full load forces a redo.
Diagnosing a failure
The errors reported carry the row number and the field at fault. The most frequent ones:
| Message | Usual cause |
|---|---|
| Value not found | The name or identifier designated does not exist yet. Check the import order, the spelling, trailing spaces in the cell. |
| Ambiguous value | Two records carry the same name. Switch to the external identifier. |
| Unknown field | The header matches no field. Correct the mapping in the dialog, or take the header from an export. |
| Date or number format | The file does not use the expected separators. Adjust them in the Formatting pane. |
Point d'attention
An import is atomic per batch, not over the whole file. If a row is refused, no row of the current batch is written and the import stops , but the batches already processed, of 2,000 rows by default, remain in the database. On a file of fewer than 2,000 rows, everything therefore happens as if the import failed as a whole; beyond that, a partial import is possible and that is precisely what the Start at line field allows you to resume.
Loading large volumes
Beyond a hundred rows, a Batch Import pane appears in the dialog. It gives access to the Batch limit (the number of rows processed at once, 2,000 by default) and to the Start at line field, which allows an interrupted load to be resumed where it stopped.
Note
An Advanced pane also exists, but it has nothing to do with batches: reserved for developer mode, it carries only two options, tracking history during the import and matching on subfields.
Note
The size of the file loaded is capped at 128 MB, unless the server is configured otherwise.
Astuce
Schedule bulk migrations outside working hours. A massive import loads the database and slows other users down.