Initial configuration
À l'issue de ce chapitre
- fill in the identity of the company and install the applications you need;
- create the users and grant each of them the level of access that matches their job;
- open portal access to an outside party;
- set up a multi-company structure.
This chapter covers the settings to be made before opening the database to users: company identity, language, applications, user accounts and access rights.
Filling in the company details
The company information feeds the header of every printed document (quotations, orders, delivery notes, invoices) as well as the legal statements.
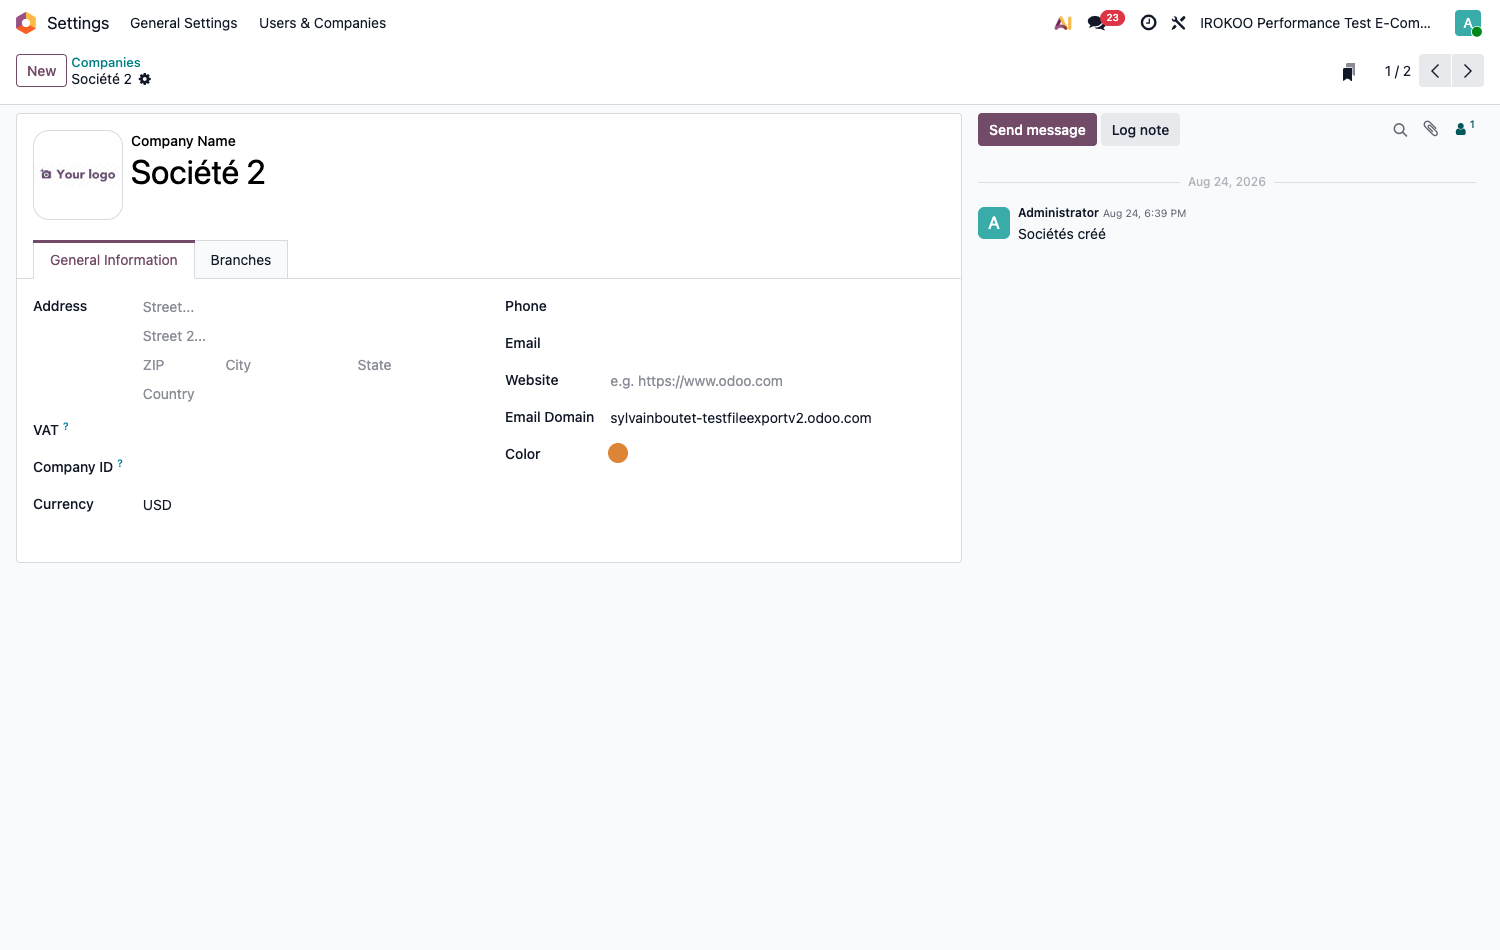
- Open Settings › Users & Companies › Companies.
- Click the existing company to open it.
- Fill in the identity: Company Name, full address, Phone, Email, Website.
- Fill in the legal identifiers: VAT and the Company ID. As soon as the company is French and the localisation is installed, this last field gives way to Siren/Siret.
- Upload the logo by clicking the image area at the top left of the form.
- Check the company's Currency.
- Save.
Note
The Siren/Siret field covers French requirements and does not apply to other countries. In every other case the field stays Company ID, and takes the identifier used in the country of registration.
Astuce
The logo is carried over onto every PDF document. A PNG file with a transparent background, at least 300 pixels wide, gives the best result in print.
Point d'attention
The company's currency determines the currency the accounts are kept in. Changing it after accounting entries have been recorded is not a trivial operation: this choice is made before go-live.
Note
Selling or buying in a foreign currency does not require the company's currency to be changed. Each pricelist carries its own, and the documents drawn up with it are denominated in that currency (see section 9.6.1). The company's currency remains the one the accounts are kept in.
Setting out the documents
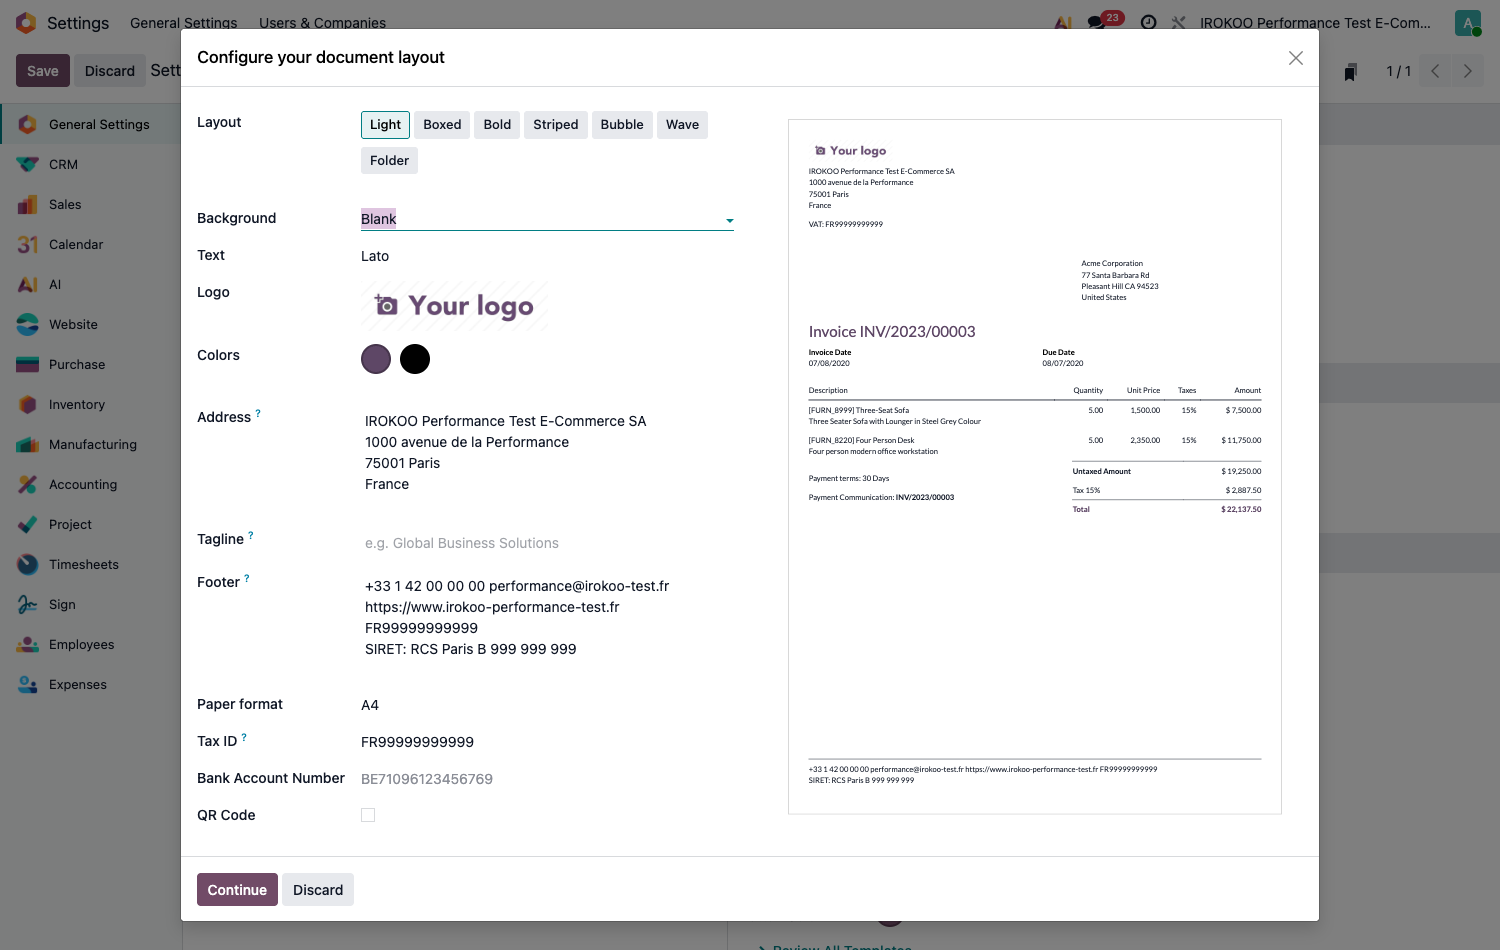
Quotations, orders, invoices and delivery notes share a single presentation, which is set in one place. It is what gives its look to everything the customer receives.
- Open the Settings application, General Settings pane.
- In the Companies block, click Configure Document Layout.
- Adjust the presentation in the window that opens; the preview updates with every change.
- Click Continue.
| Setting | What it governs |
|---|---|
| Layout | The overall arrangement. Seven models are offered (Light, Boxed, Bold, Striped, Bubble, Wave and Folder) from the plainest to the most pronounced. |
| Background | A page background, or none. A background image weighs the printing down and gets in the way of reading tables of amounts. |
| Text | The typeface of the documents. |
| Logo | Taken from the company record, and editable here. |
| Colors | Two shades, primary and secondary, applied to headings and rules. Odoo derives them from the logo, and they can be corrected by hand. |
| Address | The identity block printed at the top, taken from the company record. |
| Tagline | A strapline placed under the identity. Optional. |
| Footer | The legal statements at the foot of the page: telephone, website, VAT number, company registration number, legal form. |
| Paper format | A4 or US Letter, depending on the country the documents are going to. |
Point d'attention
The Footer carries the statements that are mandatory on invoices: legal form, share capital, registration number, intra-Community VAT number. Have it approved by your accountant before the first invoice: an invoice issued with incomplete statements is corrected by a credit note, not by reprinting it.
Note
The list of mandatory statements above covers French requirements and does not apply to other countries. Fill the Footer with whatever the country of registration requires.
Astuce
Test the result on a real document before go-live: draw up a trial quotation and print it. The preview in the window carries fictitious data, and some defects (a logo that is too large, a footer that spills onto a second page) only show up in an actual printout.
Note
In a multi-company environment, the layout is set company by company: each one carries its own logo, colours and statements (see section 5.8).
Installing the French language
A database created in English can be used in French as soon as the language is activated.
- Open the Settings application, General Settings pane, and scroll down to the Languages section.
- Click Add Languages.
- Select
French / Françaisthen click Add. - Once the installation is finished, click Switch to French (Français) & Close to switch the interface over straight away.
Note
The language is a per-user setting: each person can work in their own language from their personal preferences. Installing a language simply makes it available to everyone.
Installing the applications
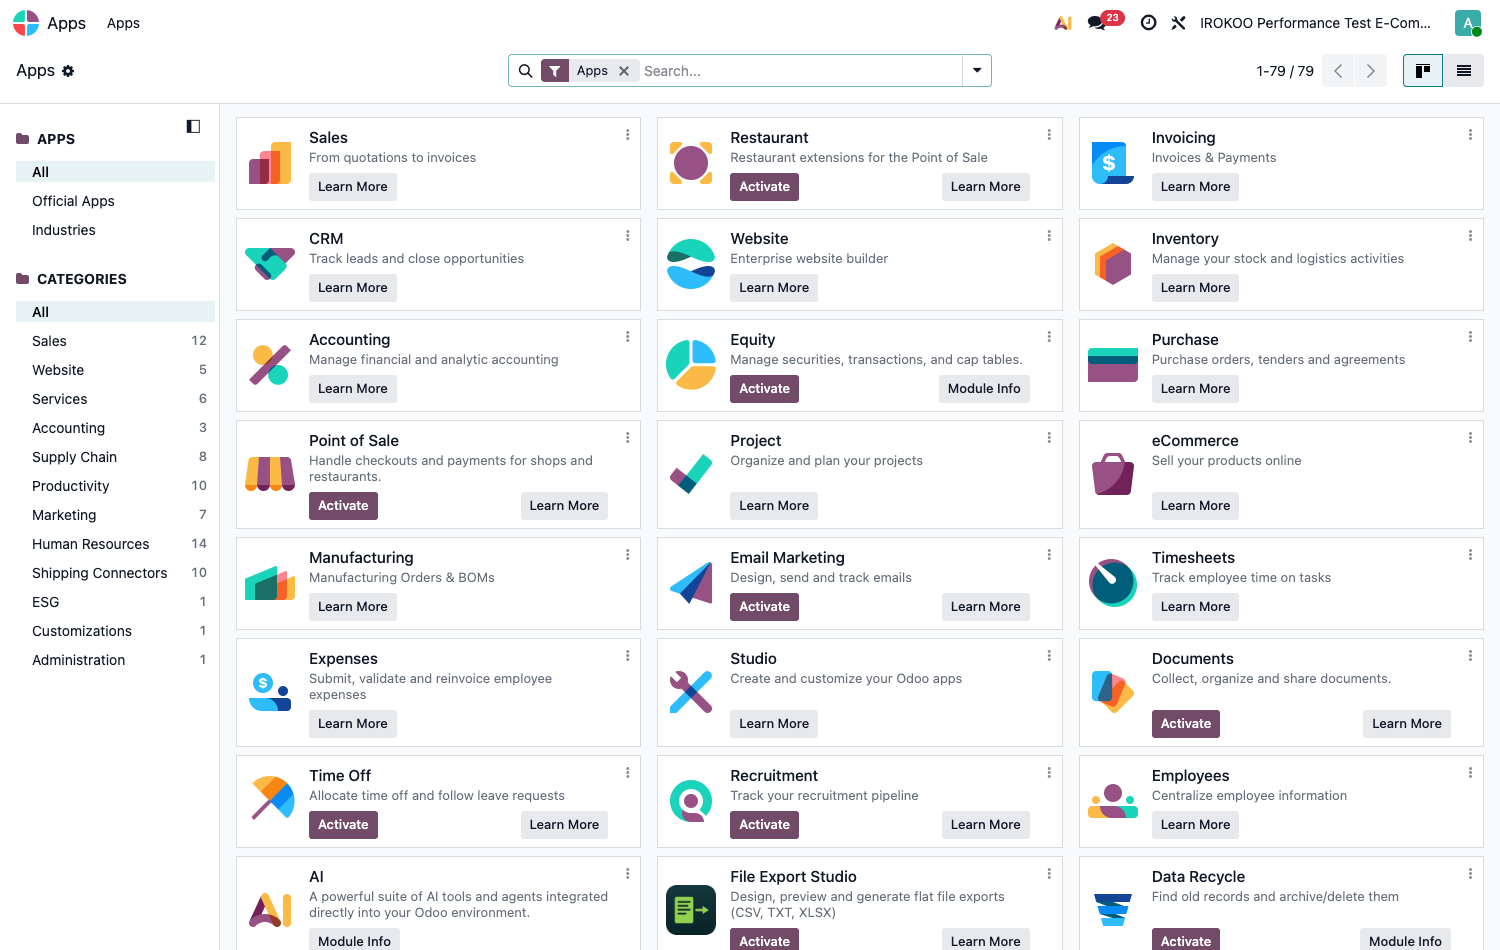
- Open Apps from the main menu.
- Search for the application you want in the search bar.
- Click Activate on the corresponding tile.
- Wait for the installation to finish: technical dependencies are installed automatically.
The applications covered by this guide are: CRM, Sales, Purchase, Inventory, Manufacturing, Accounting, Project, Dashboards.
Astuce
Install only the applications you strictly need at first. An application added later fits in with the existing data without difficulty, whereas an application installed "just in case" adds menus and fields that weigh the interface down for everybody.
Point d'attention
Uninstalling an application deletes its data. Before uninstalling, check on a copy of the database what actually disappears.
Choosing the fiscal localisation
The fiscal localisation installs in one go the country's chart of accounts, its taxes, its fiscal positions and its statutory reports. It governs all the accounting configuration that follows.
- Check that the Invoicing application is installed: the localisation is part of the base, the accounting extension is not required.
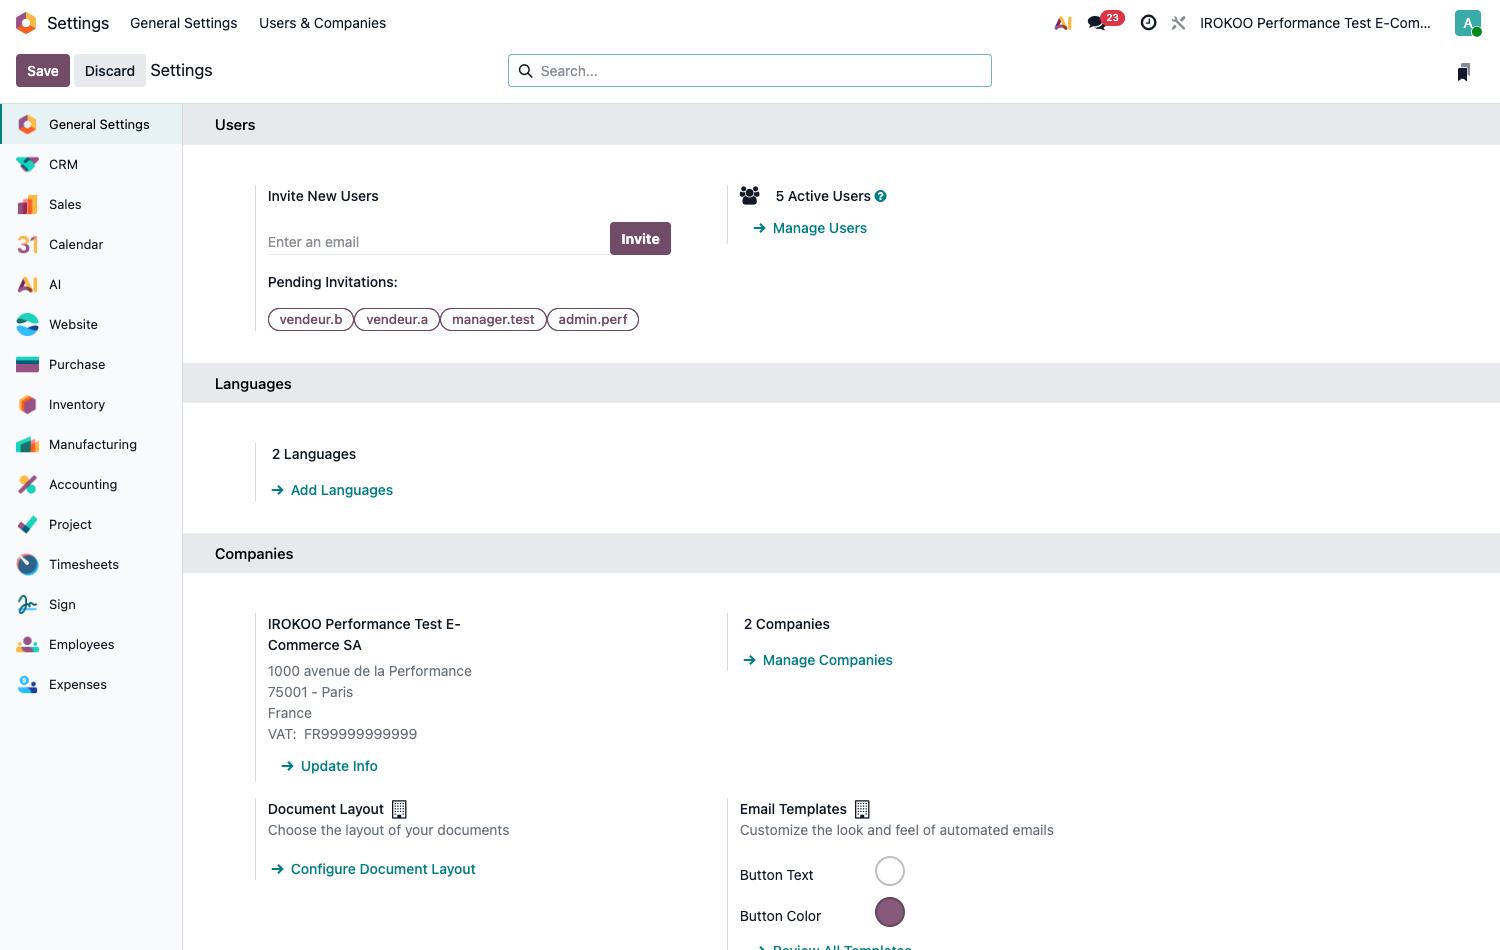
- Open Invoicing › Configuration › Settings.
- In the Fiscal Localization section, select the Package matching the country of operation: for France, the French pack.
- Save and let the installation finish: it creates several hundred accounts and taxes.
- Check the result in Invoicing › Configuration › Accounting › Chart of Accounts.
Note
The French pack given as an example above covers French requirements and does not apply to other countries. Select the package for the country your company operates in; the rest of the procedure is identical.
Point d'attention
The Package field becomes read-only as soon as an accounting entry exists in the database. Past that point, changing the localisation is no longer a configuration operation but a complete accounting migration. This is the setting to make first, before even the smallest quotation is entered.
Note
The localisation is chosen on the parent company and applies to it alone. In a multi-company structure, each entity receives the localisation of its own country (see section 5.8).
Note
The setting requires the administrator role on accounting. A user who cannot see the section does not have that level of access (see chapitre 6).
Creating the users
Adding a user
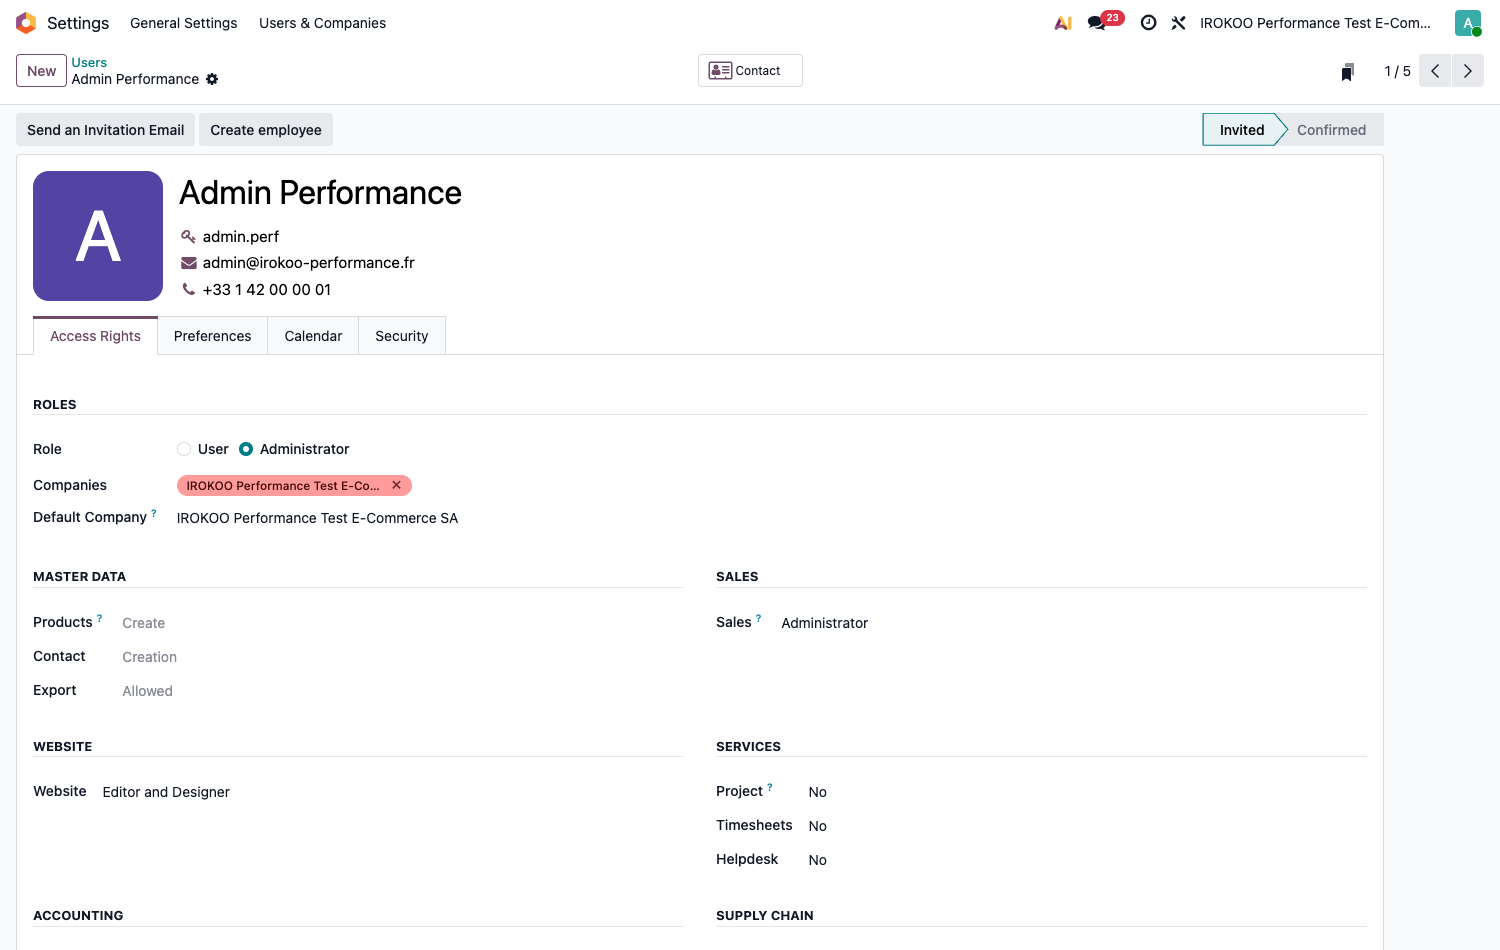
- Open Settings › Users & Companies › Users.
- Click New.
- Fill in the Name, then the email address in the field marked with the envelope icon: it serves as the login.
- In the Access Rights tab, choose the Role: - User: access to the applications according to the rights granted below; - Administrator: full access to the configuration of the database.
- Still in the Access Rights tab, set the level of access expected for each application, application by application.
- Open the Preferences tab to set the Language and the email signature, then the Calendar tab for the Timezone.
- Save, then click Send an Invitation Email: the user sets their own password from the link they receive.
Note
The Administrator role gives access to the technical settings of the database and to the management of the other users. It is reserved for the people who actually administer the system.
Going beyond the standard levels
The levels offered per area cover the vast majority of needs. Some situations call for a finer setting: a manager with full access to an application, but for whom one specific capability is to be restricted.
That setting is possible, but it requires an understanding of how Odoo combines groups, access rights and rules: an intervention made on a hunch produces effects at a distance, often noticed much later. chapitre 6 sets out how this works, and its section 6.1.6 gives the precautions to observe before any change.
Point d'attention
Grant each user the minimum rights they need. Extending rights later is immediate; working out after the fact who was able to change what is not.
Giving a customer or a vendor portal access
The portal offers an outside partner a view limited to their own documents: quotations, orders, invoices, shared projects. It does not consume a user licence.
- Open the record of the contact concerned from the Contacts application.
- Click Actions then Grant portal access.
- Tick the contact's row and check the email address offered.
- Click Grant Access: an invitation is sent to the contact.
Note
The same window lets you withdraw access (Revoke Access) or resend the invitation to a contact who did not receive it.
Setting the general settings
- Open the Settings application, General Settings pane.
- Go through the sections matching the installed applications and enable the features you want.
- Click Save at the top of the screen to apply the changes.
Point d'attention
The options in the general settings sometimes install additional modules. The first save after enabling one may take a few tens of seconds: do not reload the page during the operation.
Managing several companies
When the group comprises several legal entities, each one has its own company in the database: its own chart of accounts, numbering sequences, documents and logo.
- Open Settings › Users & Companies › Companies and create the companies you need.
- Open Settings › Users & Companies › Users and select a user.
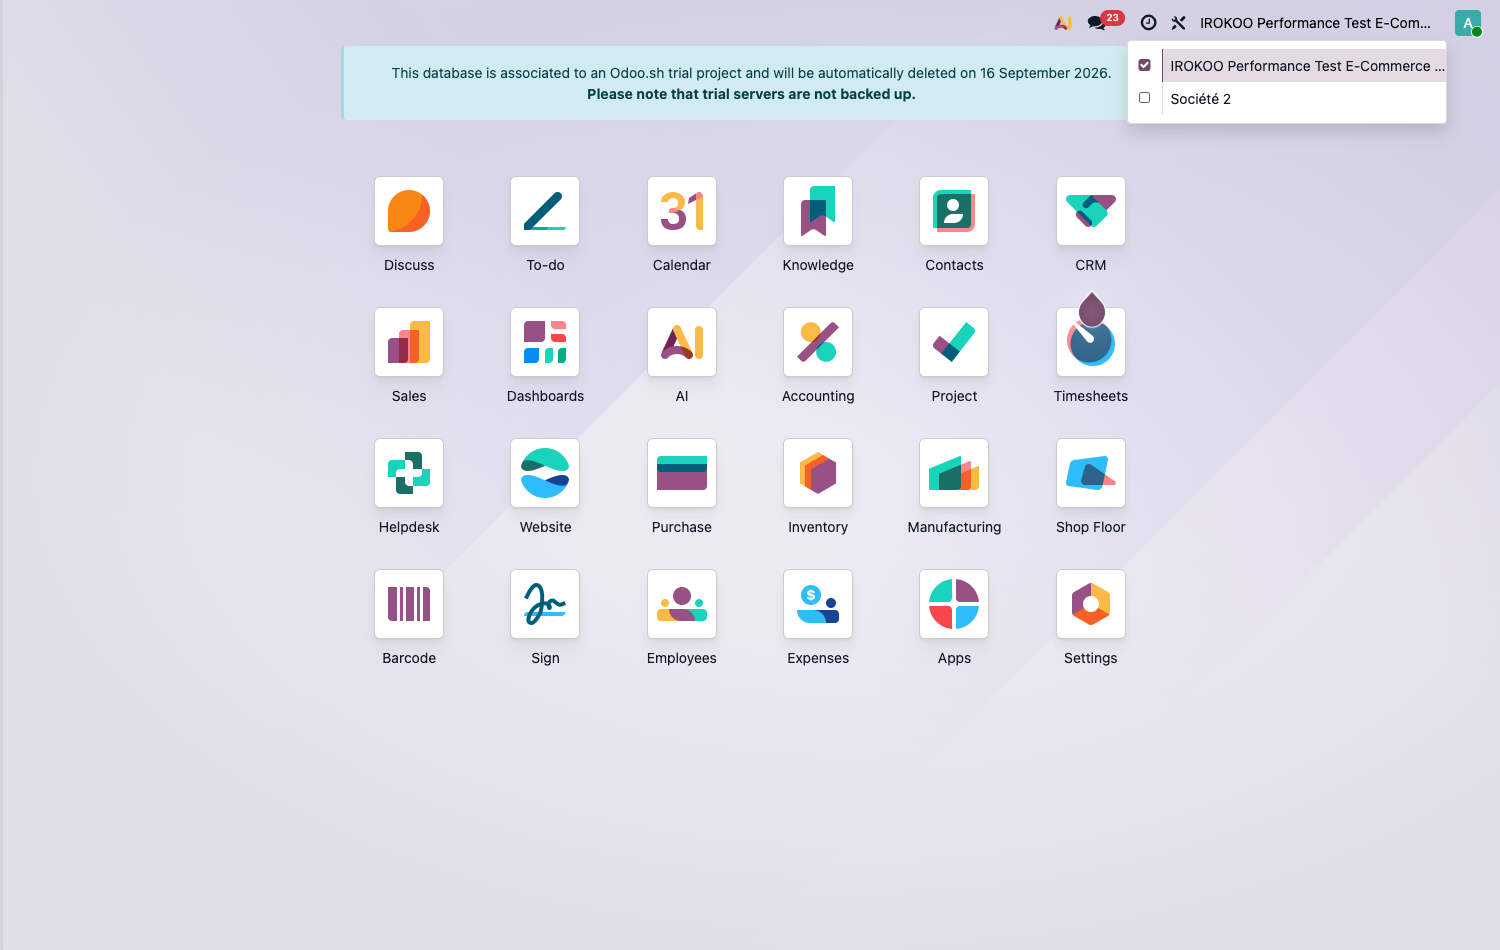
- In the Access Rights tab, fill in the Companies the user has access to and the Default Company at the opening of a session.
Note
The user switches from one company to another, or activates several at once, using the selector in the top bar, on the right.
Points to check before opening the database
Before moving on to configuring the business modules, check that:
- the company information is complete and accurate, logo included;
- the currency and the fiscal localisation match the country of operation;
- the applications you need are installed;
- the key users are created, with the appropriate role and rights;
- if the context calls for it, the multi-company structure is in place.
Note
A carefully done initial configuration avoids costly data migrations and makes it easier for the teams to adopt the system.